Project details
Skill
Cost
Estimated Time
As an outdoor entrance into the basement, bulkhead doors are one of your home’s exterior defenses that should be regularly serviced and maintained. This type of door comes in many materials and should be replaced as they begin to show wear to ensure your basement stays dry. They are typically made from treated wood or steel. Plastic and fiberglass are alternatives but aren’t recommended because plastic doors are prone to breakage from fallen debris, and fiberglass often cracks or warps after extended exposure to sunlight.
When Is the Best Time to Replace Bulkhead Doors?
The best time to replace bulkhead doors is when the materials begin to show signs that they’re no longer sound. This could mean significant rust and corrosion of steel doors or warped or rotten wood doors that no longer latch or sit squarely on their frames. Don’t wait too long to replace your bulkhead doors after you notice signs of unsoundness. Water damage and exposure can rot and degrade the frame and foundation underneath, creating a more extensive and expensive repair.
Tips for Wood Bulkhead Door
If you want to build new door out of wood, you’ll have the best results using tongue-and-groove cypress, cedar, or mahogany held together with stainless-steel fasteners and hardware. Make sure any wood that’s in contact with stone, mortar, or concrete is treated with a preservative. Protecting the wood with a primer and a solid-color acrylic stain is easier to maintain than paint, and it won’t peel; be sure to coat all sides and edges. Whether you are replacing your bulkhead doors with new wood or steel doors, the installation process is the same.
How to Replace Bulkhead Doors
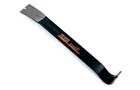
To replace your existing bulkhead doors, start by cutting through the hinges on the old bulkhead doors using a right-angle grinder fitted with a cutoff wheel. Remove both doors, then use the grinder to grind off the screw heads from the brackets that secure the bulkhead to the foundation. Pry off the metal frame of the old bulkhead, then remove the header along the top of the opening. Do not disturb the existing flashing—it can be trimmed and reused later after you’ve attached the new doors.
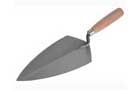
Next, mix up a batch of grout using a ½-inch drill and a mixing paddle. Before applying the grout, liberally brush water onto the exposed concrete foundation around the bulkhead opening. This will prevent the concrete from leeching moisture from the wet grout mixture. Apply the grout in an even layer along the top of the foundation walls with a pointed brick trowel and be sure to fill all voids and cracks. The grout should take up to an hour to cure.
Once the grout is set, cut and install pressure-treated 2×10 sills to the top of the foundation wall. Screw the sills to the house framing, then fasten them to the top of the foundation with masonry screws. To do this, drill screw-shank clearance holes through the 2x10s, then bore pilot holes down into the concrete foundation with a hammer drill. Then use a cordless drill to drive a 3-inch masonry screw into each pilot hole.
Next, install a pressure-treated 2×6 sill across the bottom of the bulkhead opening. This sill should be at the same plane and angle as the side sills. Then, cut the 2x10s sills to length, flush with the bottom sill. You can now begin installing the new bulkhead door by setting the bottom foundation plate across the bottom of the opening.
Mark the foundation plate to the proper length, then cut it with the grinder. Next, use the grinder to cut the two side foundation plates to length. Remove the foundation plates and apply a self-stick membrane to the top surfaces of all the pressure-treated sills. This will protect the wood from galvanic corrosion from contact with the steel.
Spray a coat of metal primer onto the fresh-cut ends of the foundation plates and set them on top of the pressure-treated sills. Then, apply a thick bead of silicone sealant along the flashing at the top of the opening. Slide the bulkhead’s metal header underneath the flashing, then press it down into the silicone sealant.
Set the doorframe on top of the foundation plates and secure it with nuts and bolts. Drill pilot holes through the foundation plates, then secure the doorframe with sheet metal screws. Use a utility knife to trim off the excess flashing across the top of the bulkhead doors, then apply a bead of silicone sealant across the header, directly beneath the flashing. Press the flashing down into the sealant.
Install the two bulkhead doors by sliding them into the hinge pins. Close the doors and check to confirm they’re square in the opening. If not, adjust the doorframe. Once you’re satisfied with the fit of the doors, finish screwing down the doorframe and attach the torsion springs to the inside of each door.
Lastly, apply silicone sealant around the inside and outside perimeter of each door and spray primer onto each exposed screwhead. To protect the new bulkhead doors, apply a coat of exterior grade oil-based paint.